
How to Clean Your Sebenza
These instructions apply to the Sebenza 31, 21, Regular, Classic, and Umfaan.
Tools
Instructions
1. Loosen and remove the pivot pin and screw
With the blade closed and the 5/64" wrench properly seated, loosen and remove the pivot screw. The pivot screw is the left-most screw on the front of the knife, toward the blade. Screws are always on the front of the knife and pins are on the back. Then open the knife to about 45° and use the wrench to push the pivot-pin through.

2. With a little pressure on the lock bar, slip the whole blade assembly out.
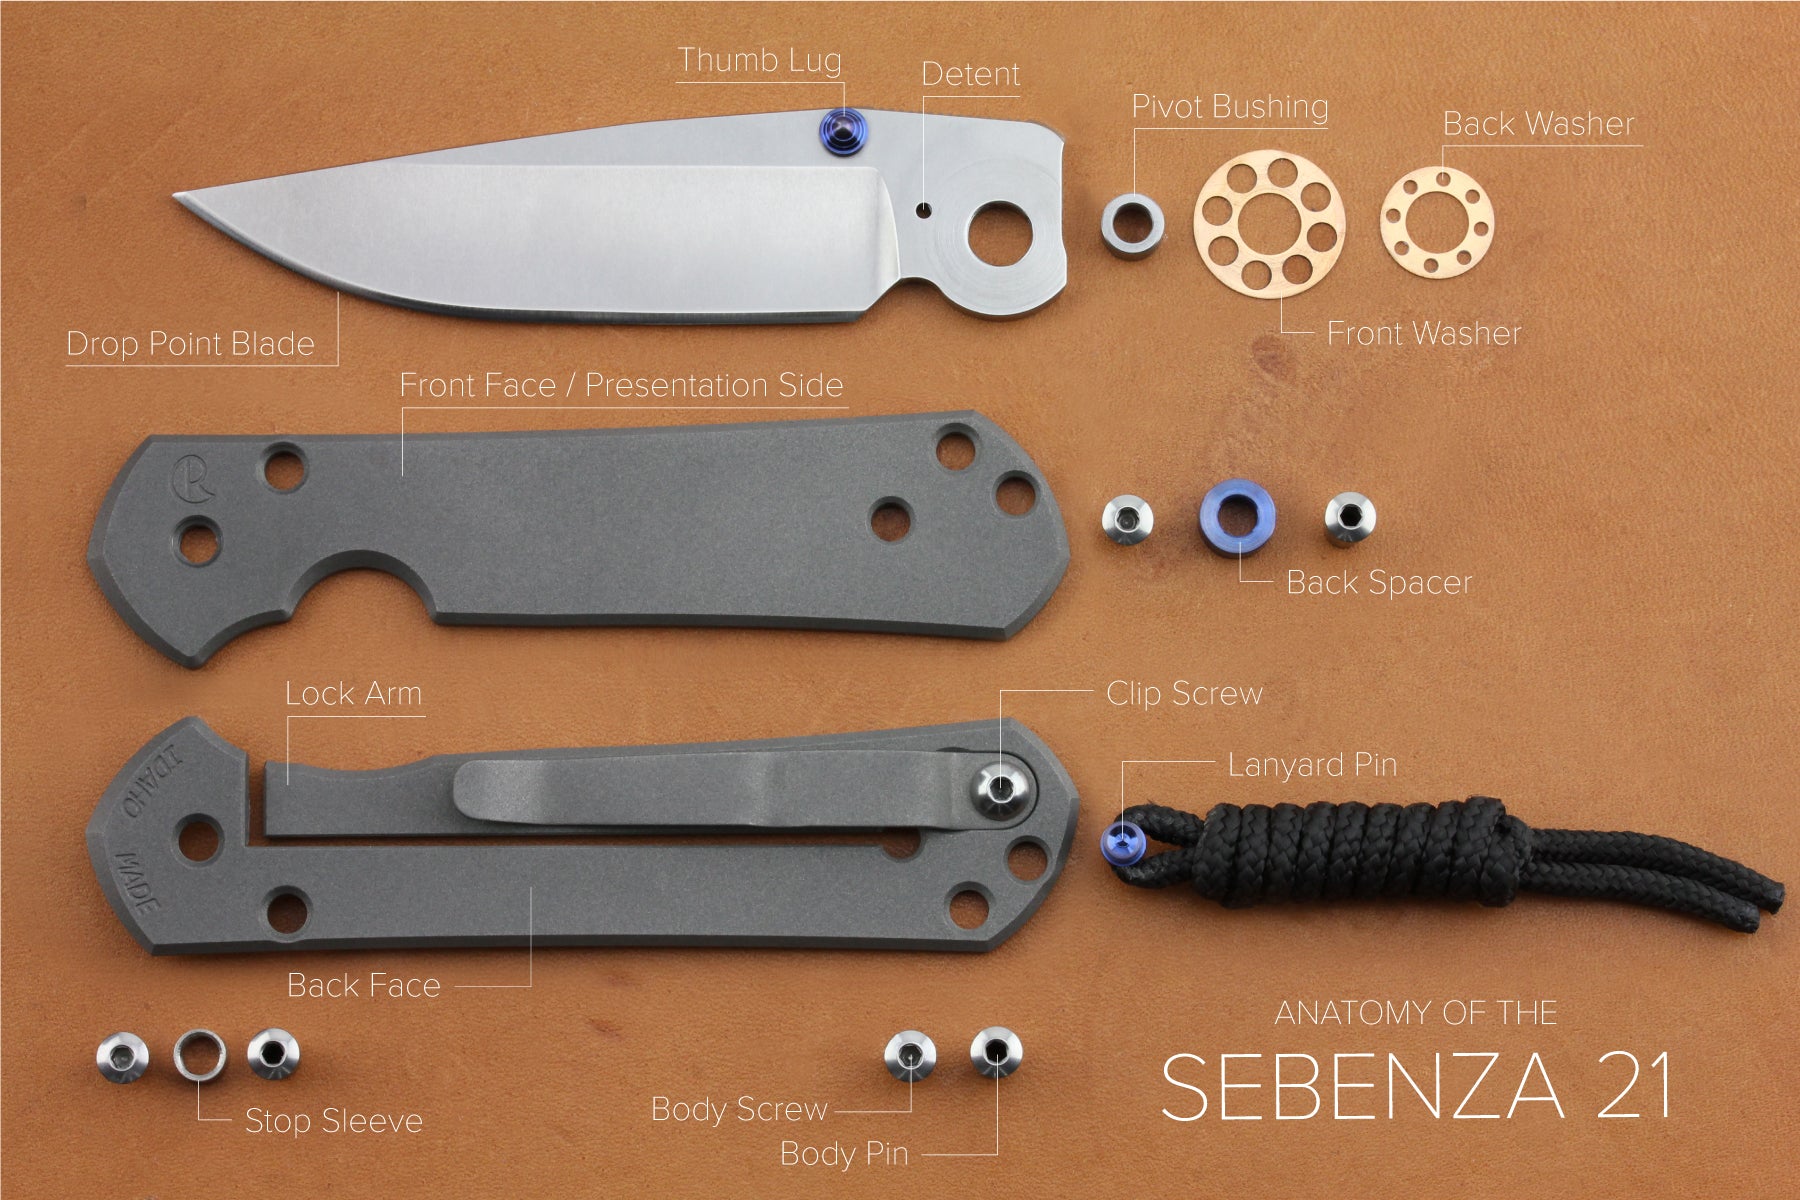
Pull the blade straight out, remove each part, and set aside. The blade assembly consists of the blade, 2 phosphor-bronze washers, and the pivot bushing.

3. Loosen and remove the remaining body screws.
Use a finger to hold the back body pins in place while you loosen the remaining body screws. Push the body pins out and remove the front handle face. Take note of what the inner handle assembly looks like. Use a paper towel to remove debris. Clean the pivot area really well, and if needed, use a drop of lacquer thinner or Windex to remove any remaining goo.

4. Re-assemble the inner handle.
Insert the back body pin first through the back handle and layer the backspacer on top. Then insert the stop-pin and layer the stop sleeve on top. Finally, add the lanyard assembly back in. Note: Should you choose to remove the lanyard on the Large Sebenza 21, you must remove the lanyard pin as well.

5. Apply the front handle face.
With the wrench properly seated, tighten the remaining body screws to snug. Set the handle assembly aside.

6. Prepare the blade assembly
Tap or massage the tube of Fluorinated Grease to ensure it is properly mixed. Put a tiny drop inside the blade pivot hole, then insert the pivot-bushing. Apply a small amount of Fluorinated Grease around the outside of the pivot hole to hold the washers. The small washer will go on the back of the blade, to accommodate the lock-bar, while the large washer will go on the front. Center the washers around the pivot hole.

7. Insert the blade assembly into the handle assembly.
Hold the front and back washers in place using your index finger and thumb. Disengage the lock bar with your other hand. Slide the blade assembly in at about 45 until the blade hole is aligned with the pivot hole on the handle and the lock bar opens up. Do not force the blade assembly in. If you're struggling, remove the blade assembly, realign your washers, and try again. Do not loosen any part of the handle assembly. Once center-aligned, insert and tighten down the pivot pin and screw.
Note: It's very important not to bend your washers. If you do, you'll have to send your knife in for service, since washers are hand fit to each blade.

Three-point check
- Action. The Sebenza is known for its "bank-vault" feel and sound. While opening and closing can get buttery-smooth over time, the knife is not designed to fling or fall open. If you take your finger off when opening, the blade should stop. The motion should feel hydraulic, but it should not be hard to open. If the action off, double check that your blade assembly is aligned and centered and screws are snug. If everything looks good but it doesn't feel smooth, you may just need to use your knife a few times so that the fluorinated grease can distribute throughout the pivot.
- Lock-up. To eye-ball check your lock-up, open the knife fully so that the lock-bar engages, palm up. Look to the end of the lock-arm where it engages the blade. The lock-arm should engage 50 - 75% of the blade tang. Older Sebenzas may have a farther lock up.
- Blade play. Open the knife to its fully open position. Disengage the lock-bar and with the blade still open, try to wiggle the blade from side to side. If the blade wiggles, tighten the pivot screw.
Video
If you have any questions, feel free to email us at crkinfo@chrisreeve.com.